iDrug
Quick Start Guide
This page explains how to use iDrug step by step. Each section below includes a dedicated image slot so you can later replace placeholders with your own screenshots, workflow diagrams, or interface captures.
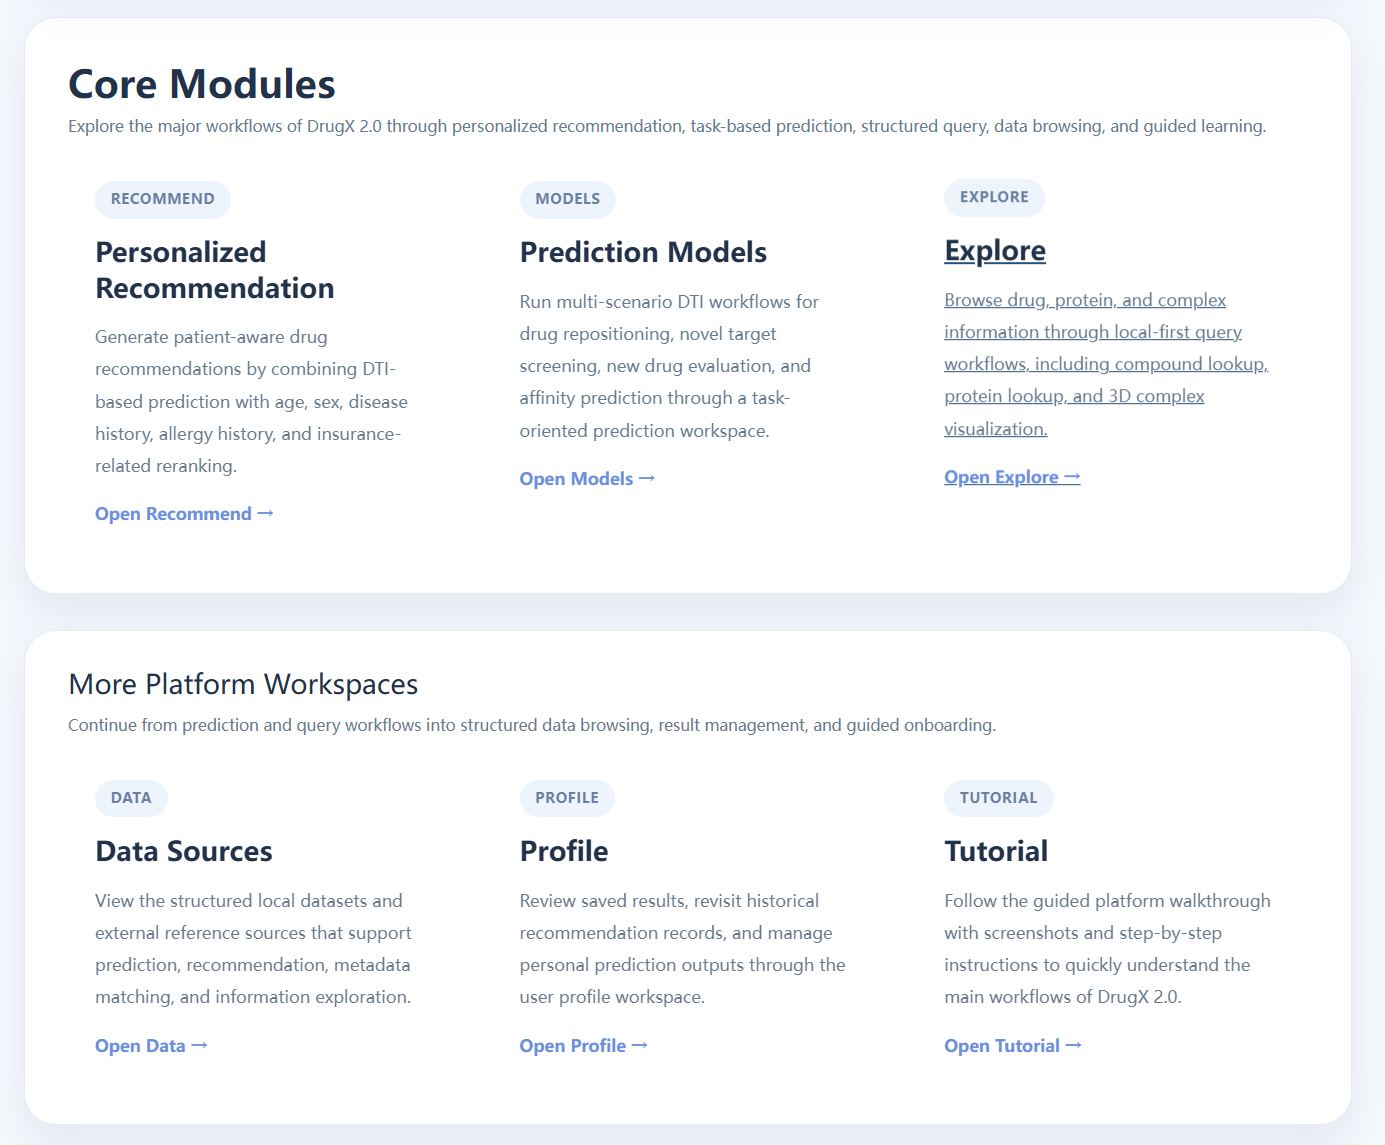
Platform Overview
iDrug integrates personalized recommendation, multi-scenario prediction, structure exploration, data browsing, and user history management into one workflow-oriented platform. This opening block is suitable for a full-page overview screenshot or a compact workflow diagram.
- Use Recommend for patient-aware drug reranking.
- Use Models for task-based prediction workflows.
- Use Explore for drug, protein, and complex lookup.
- Use Data and Profile for browsing and record management.
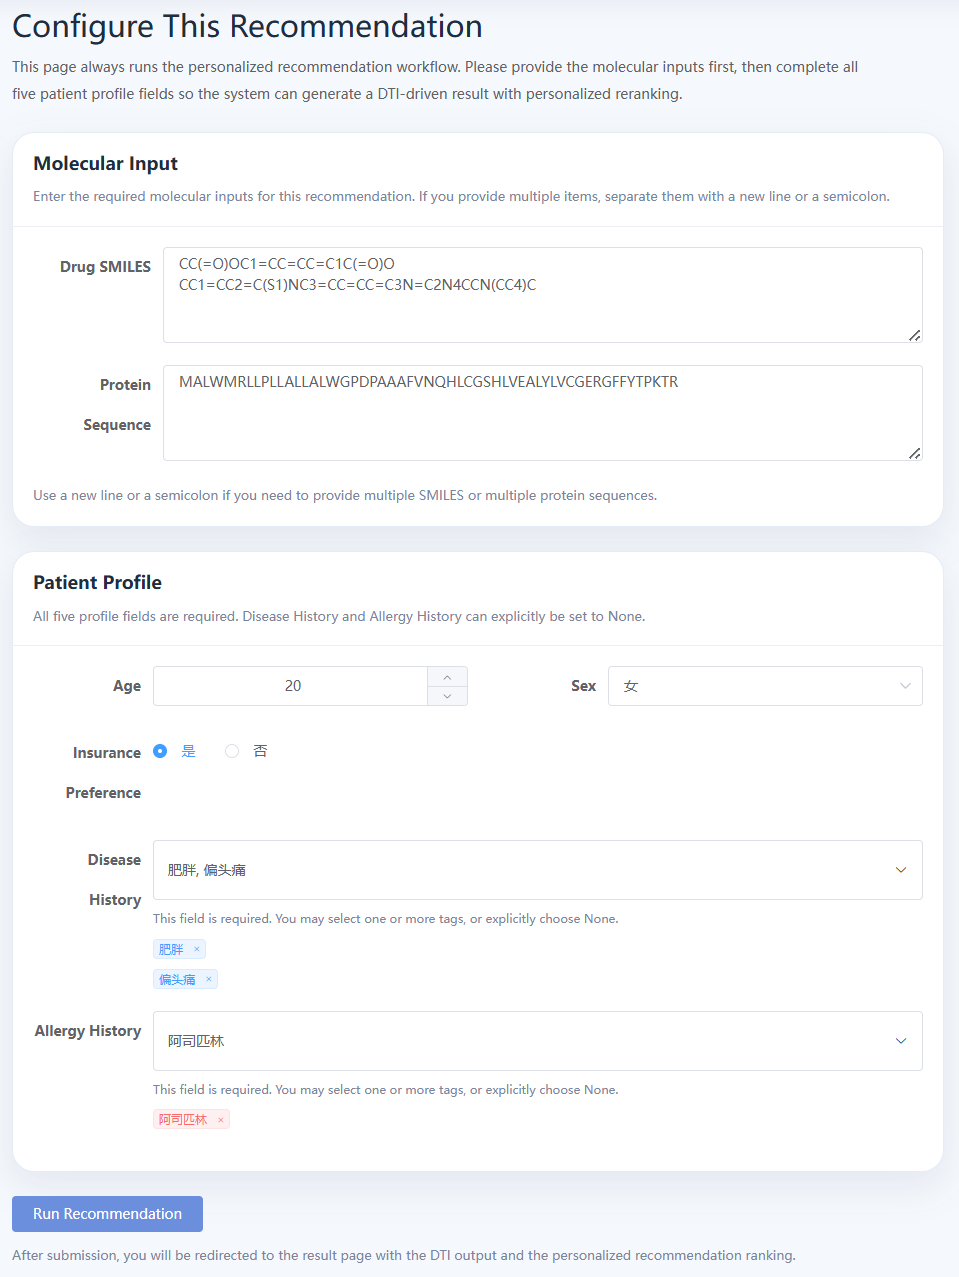
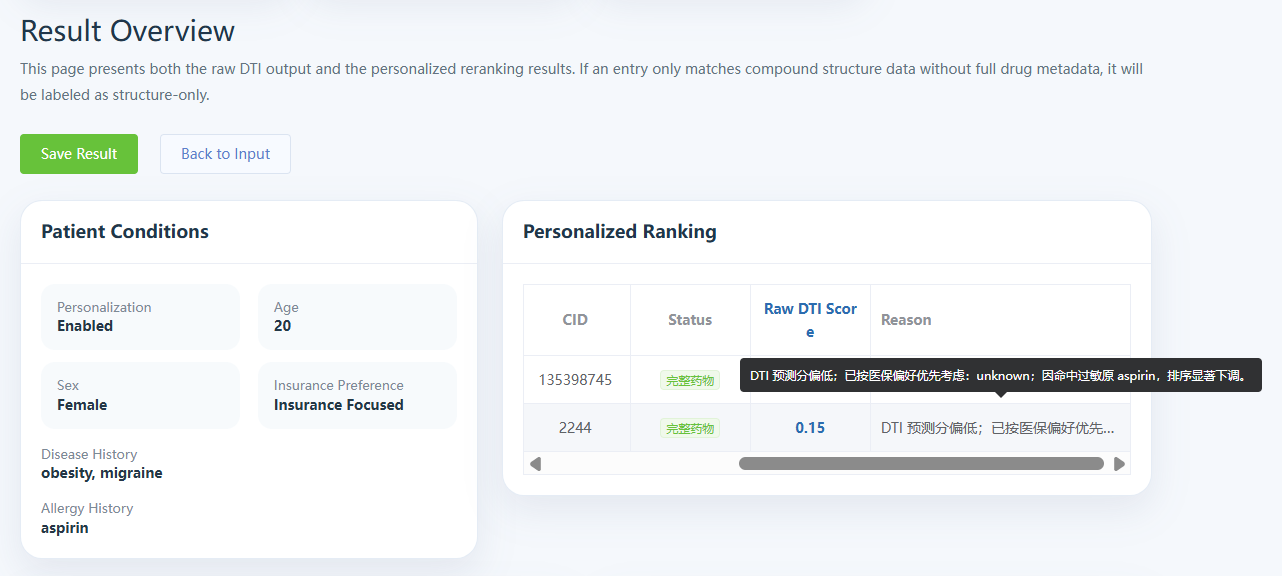
Personalized Recommendation
This workflow combines drug SMILES, protein sequence, and patient profile inputs to produce patient-oriented recommendation results. It is the most suitable place to show both the input interface and the final recommendation output.
- Enter drug SMILES and protein sequence.
- Complete age, sex, disease history, allergy history, and insurance preference.
- Run the workflow and review recommendation reasons.
- Observe the difference between raw model score and final recommendation logic.
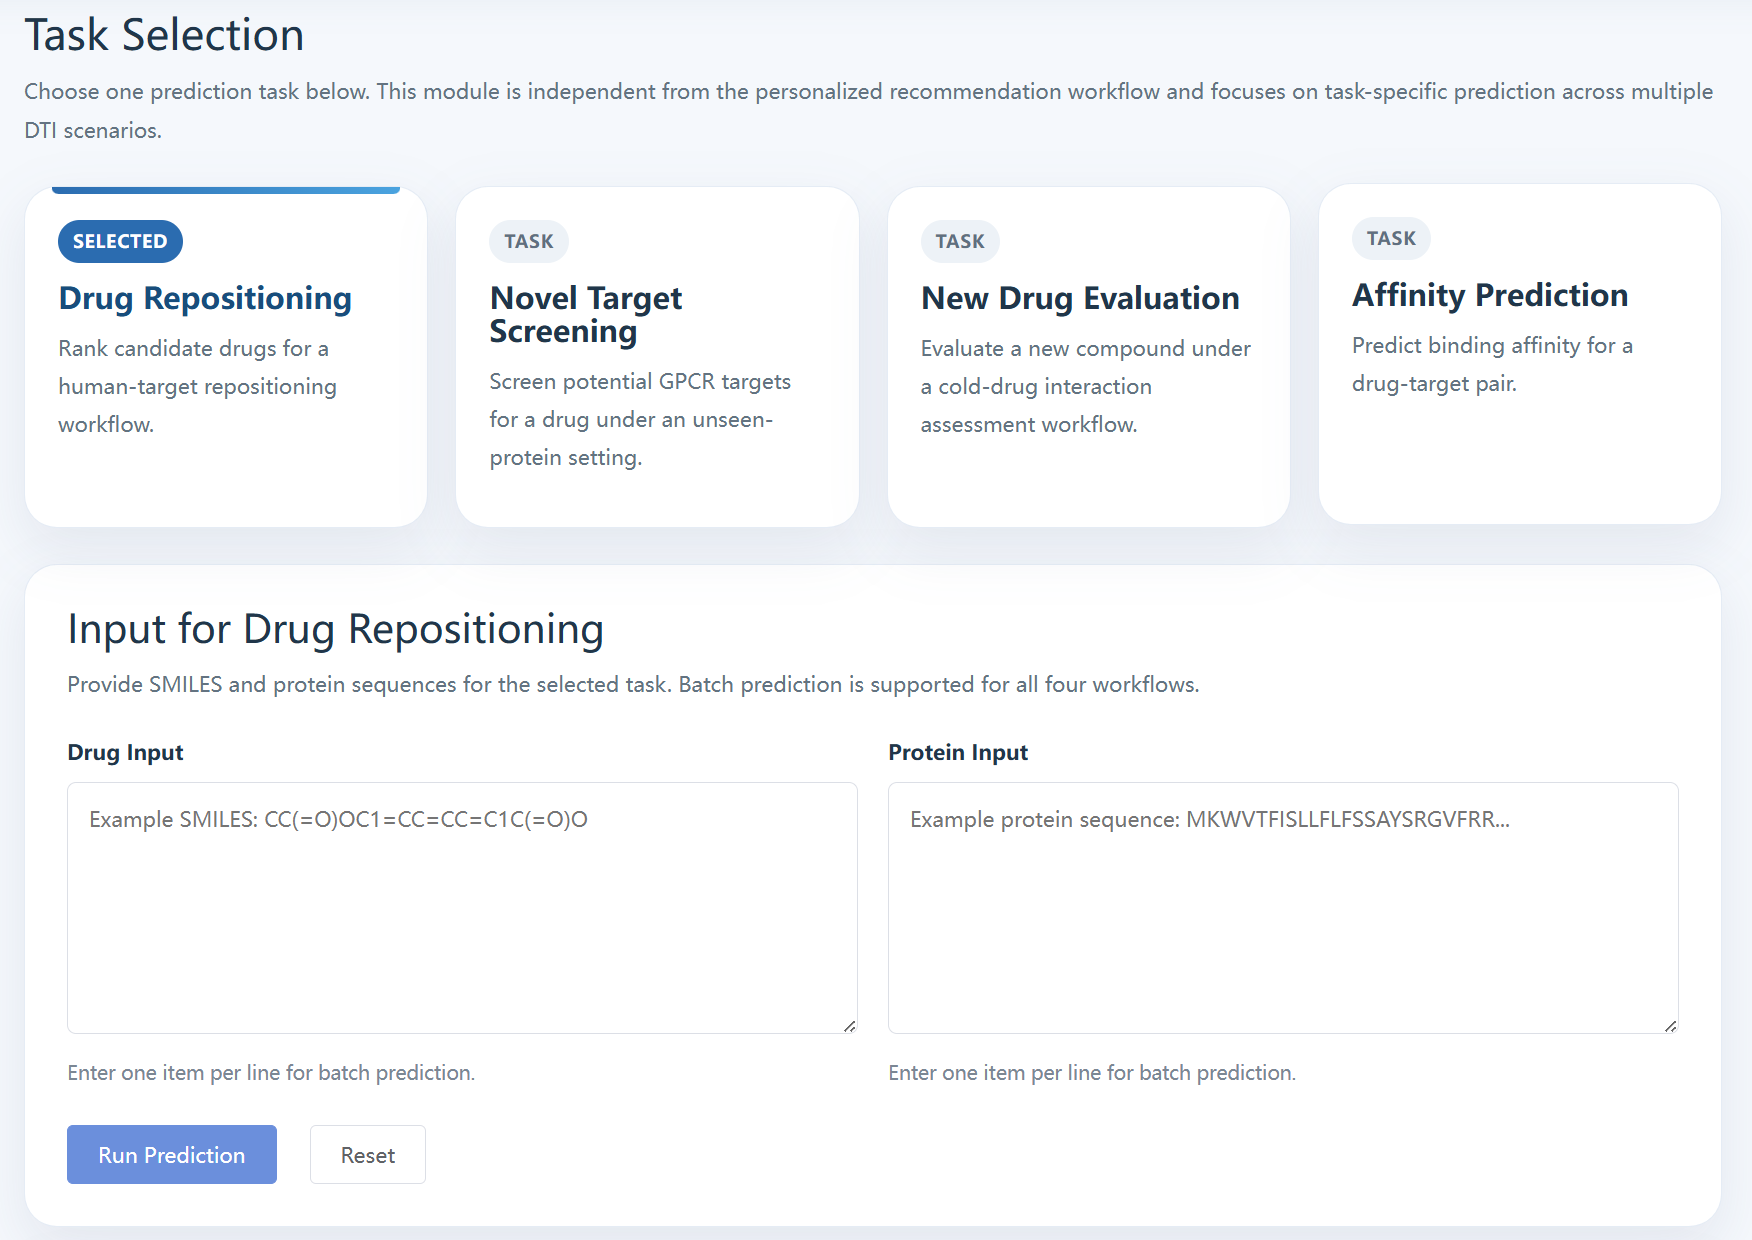
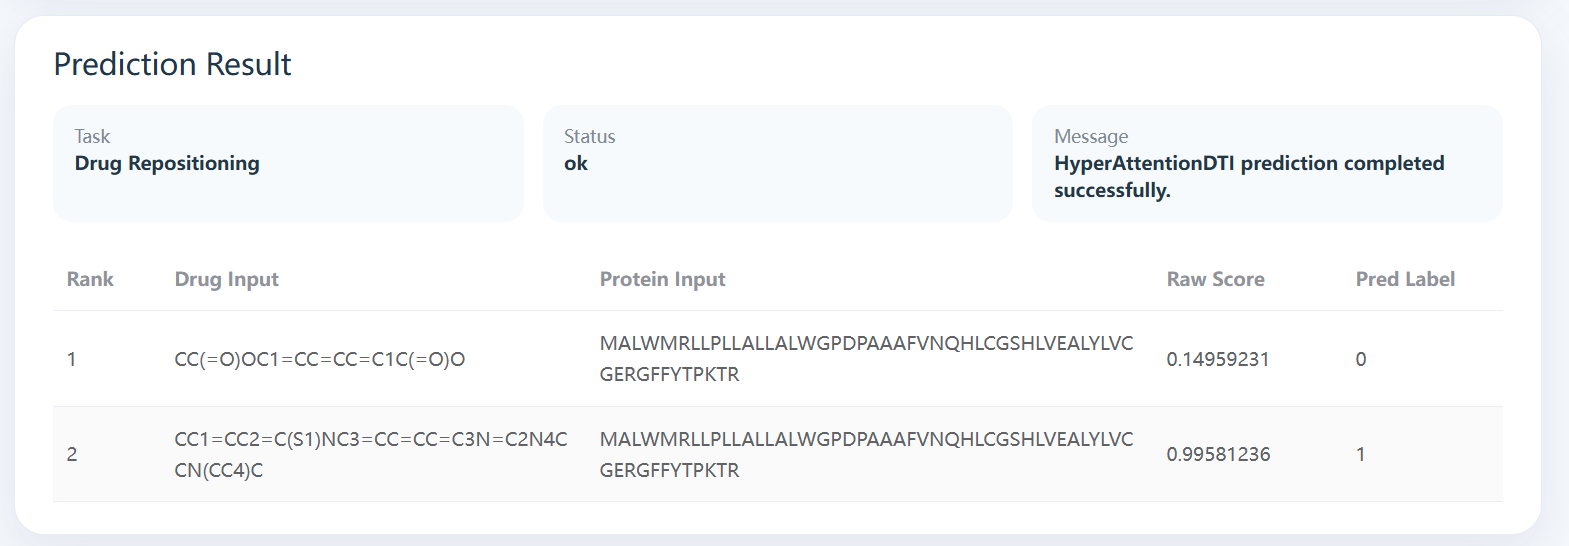
Prediction Models
This module supports multiple DTI-related tasks, including drug repositioning, novel target screening, new drug evaluation, and affinity prediction. It is ideal for showing the task selection area together with a representative result panel.
- Select one of the four prediction tasks.
- Provide SMILES and protein sequence inputs.
- Run the selected workflow.
- Review the raw score and prediction result returned by the current task.
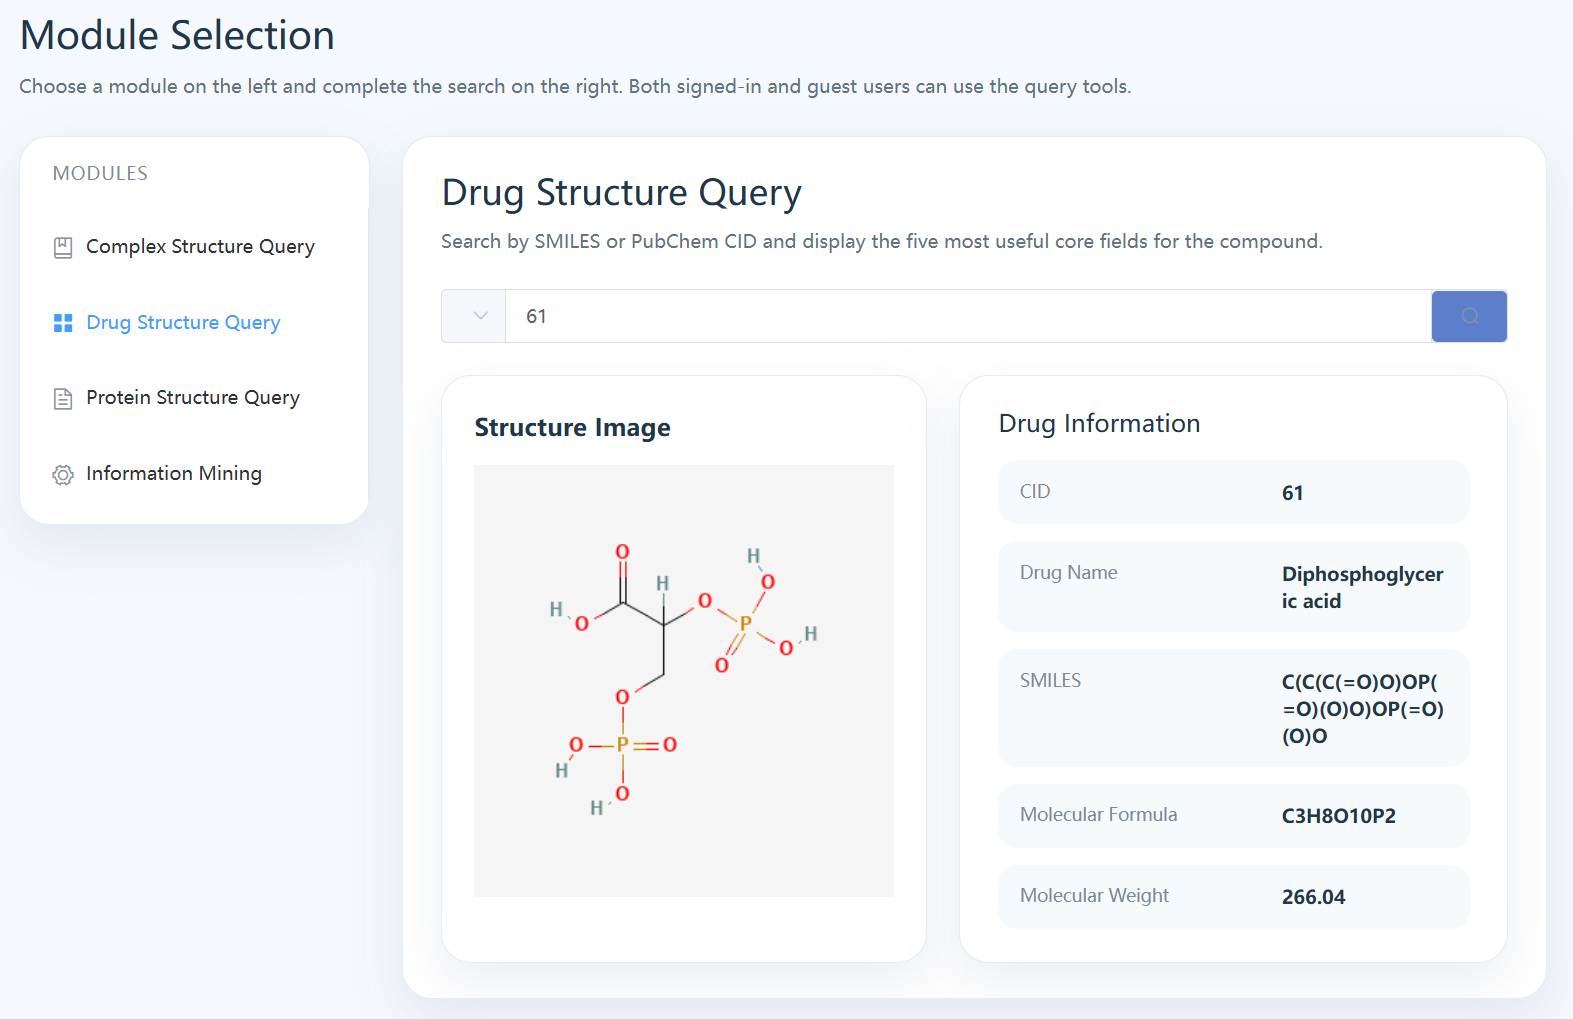
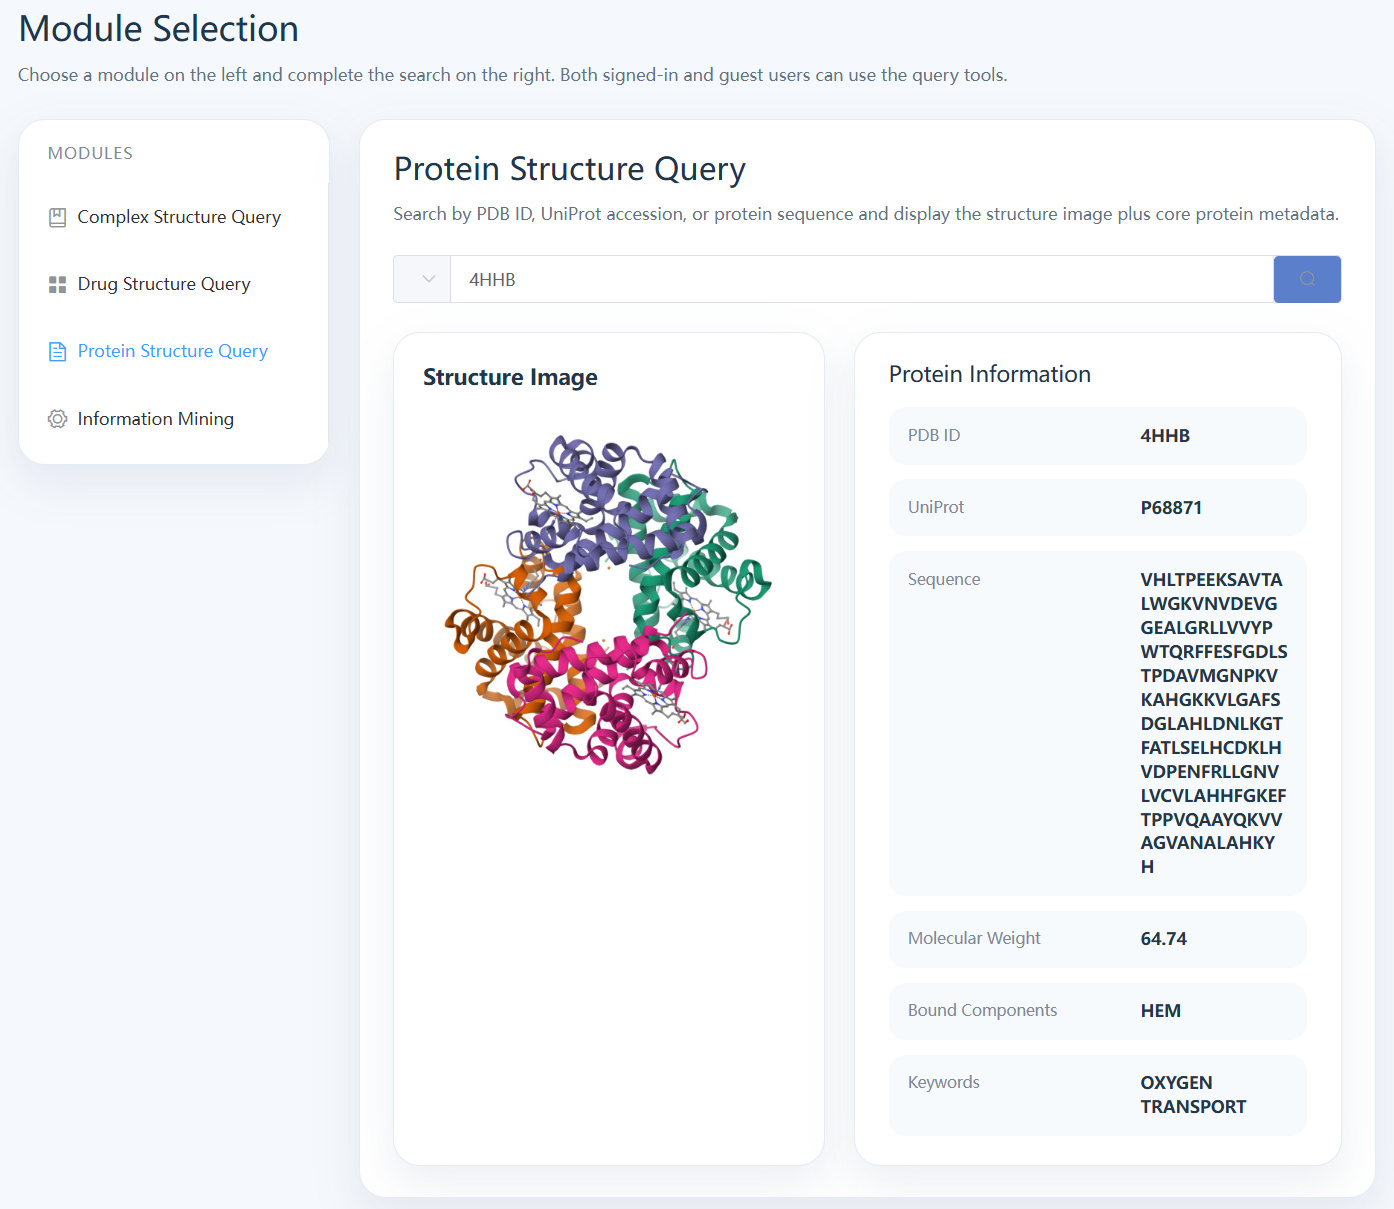
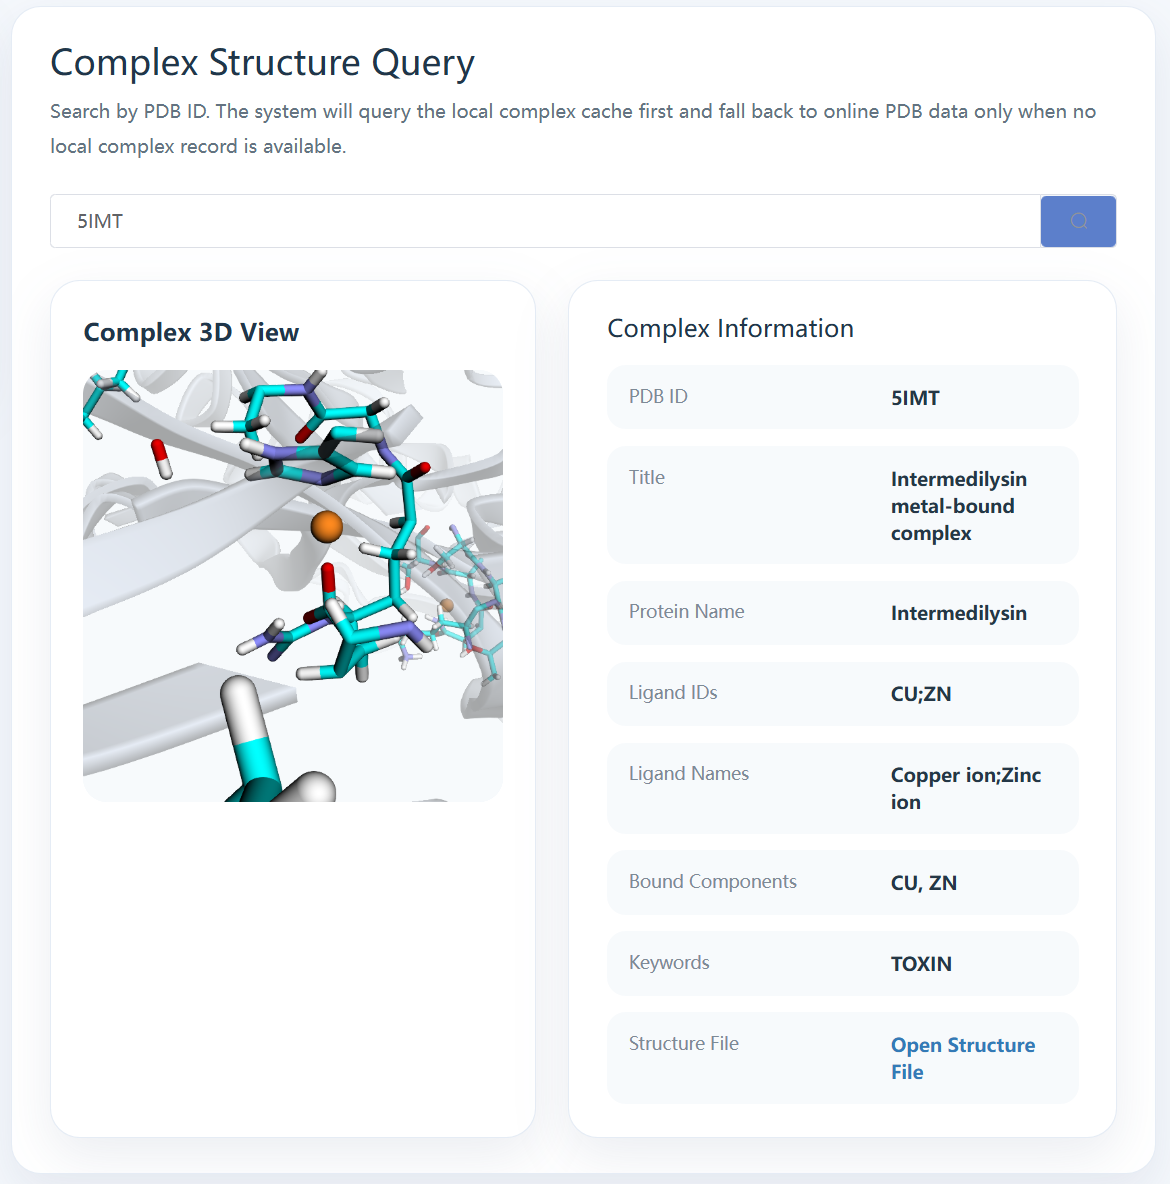
Structure Exploration
The Explore page supports compound lookup, protein lookup, and local-first complex query with 3D visualization. This section works best when several screenshots are shown together to illustrate the breadth of the exploration module.
- Use drug lookup for CID and structure-level exploration.
- Use protein lookup for sequence and metadata review.
- Use complex query for local-first retrieval and complex rendering.
- Interact with the 3D viewer to inspect ligand-focused complex structures.
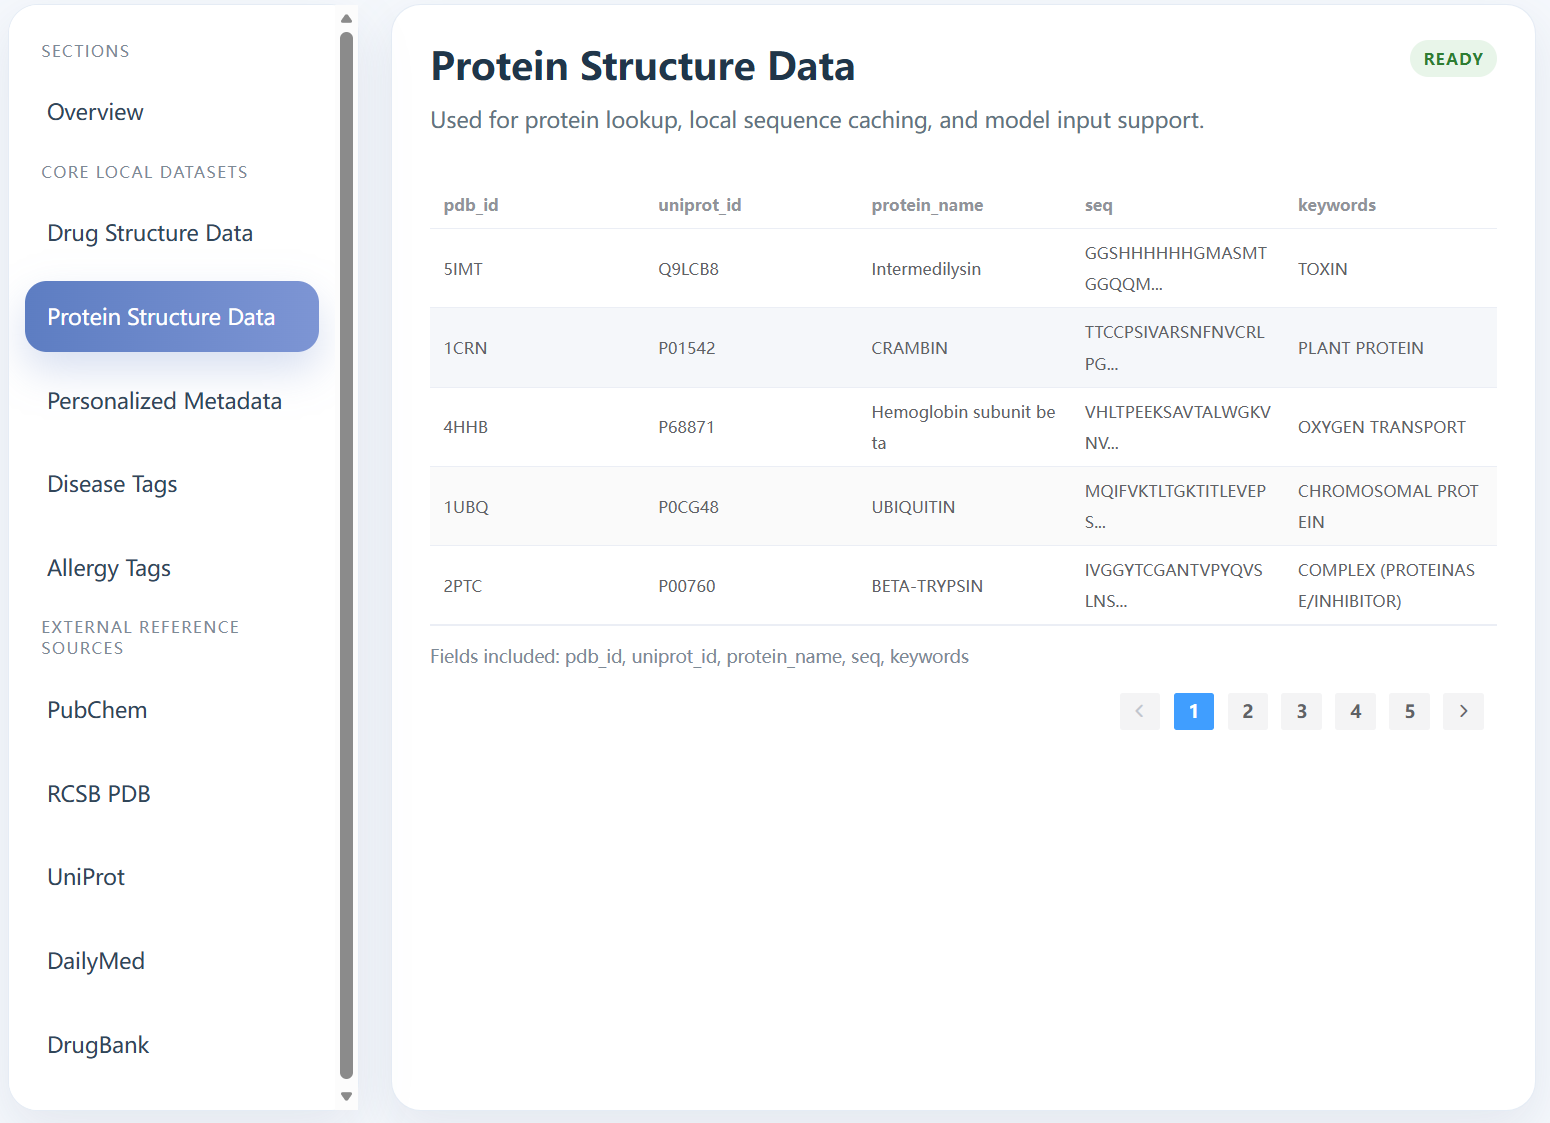
Data Browser
The Data page summarizes local datasets and external reference sources. It is suitable for one screenshot that shows the left-side category navigation and the right-side data preview table.
- Browse local drug, protein, and personalization datasets.
- View disease and allergy dictionaries.
- Inspect external reference source summaries.
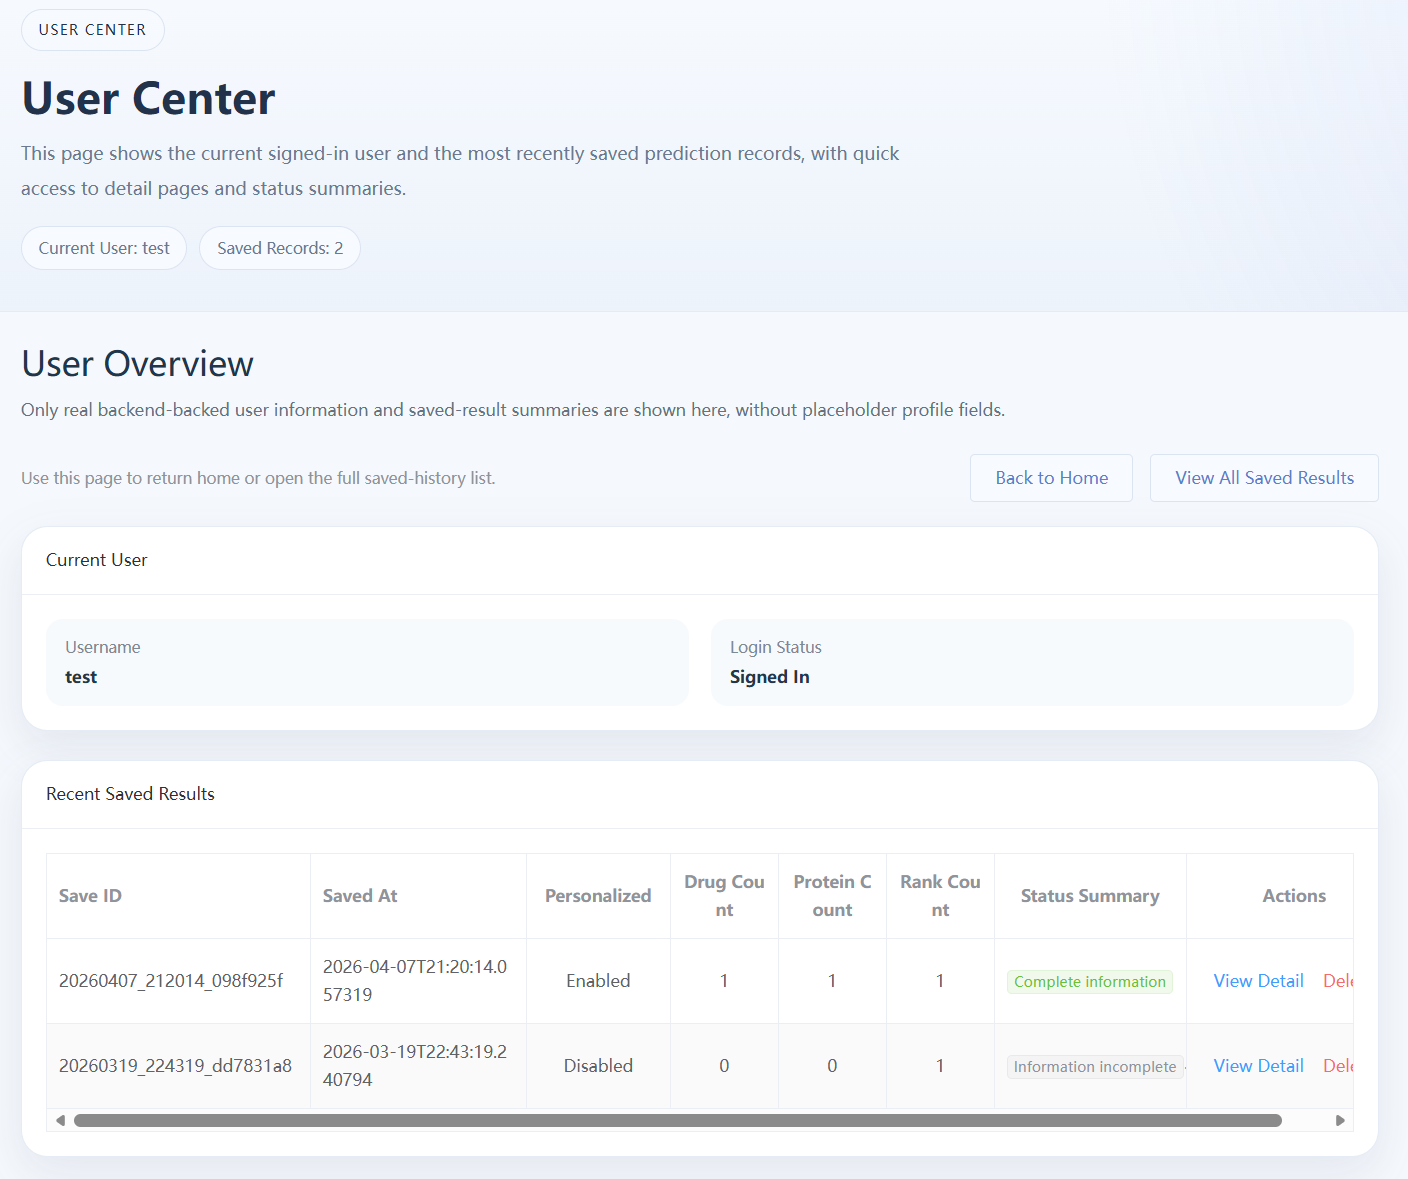
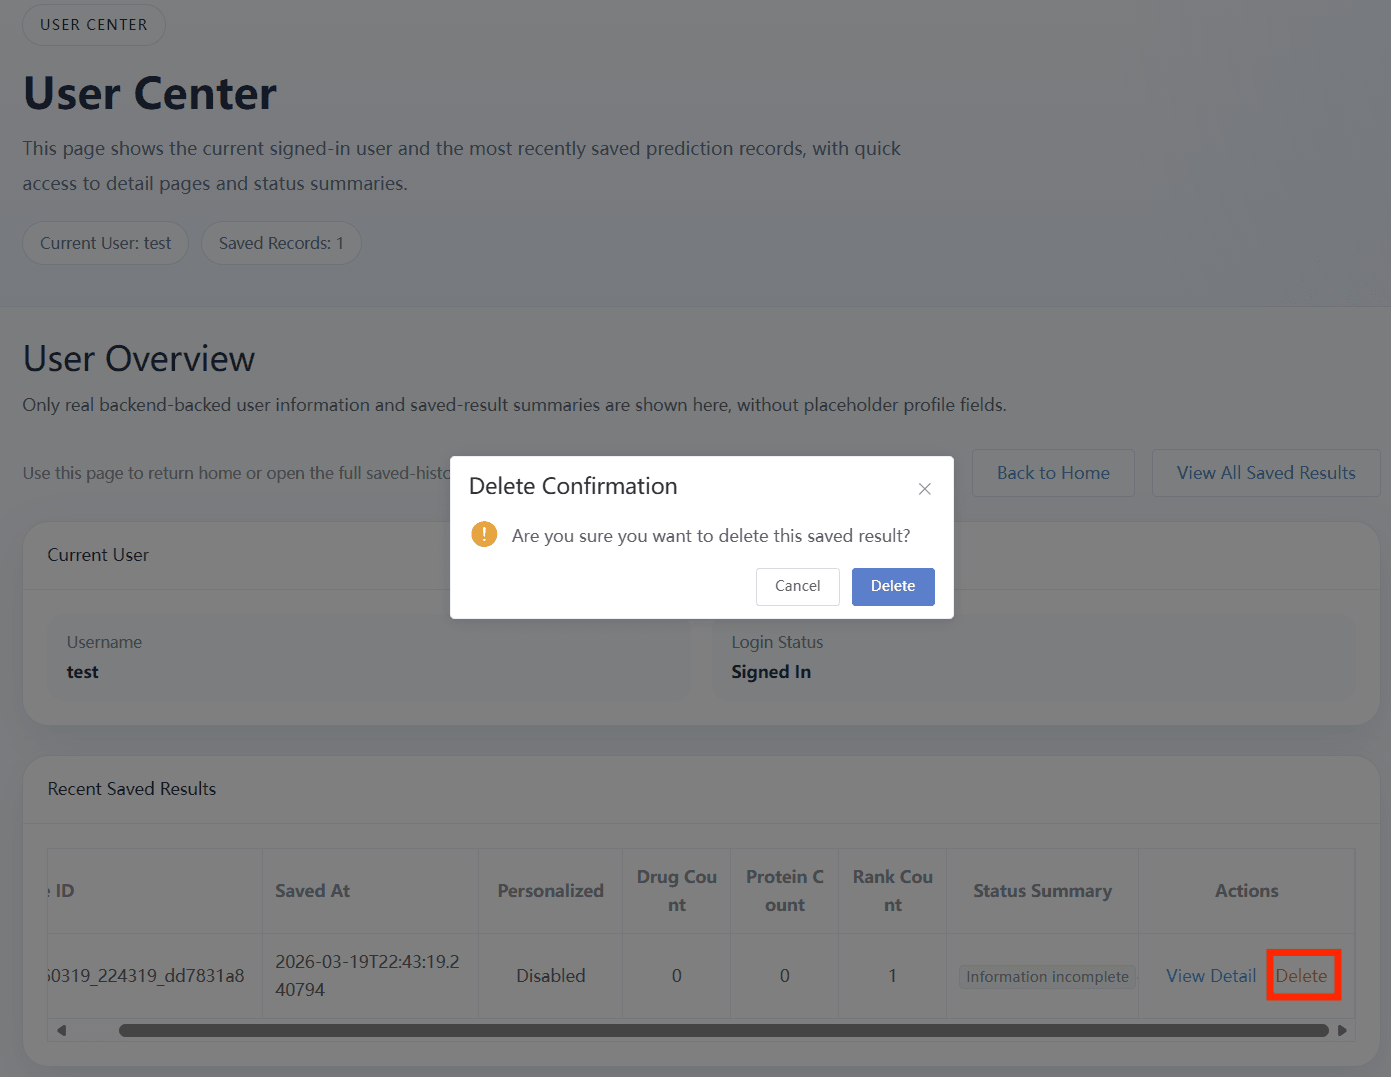
User Profile and Saved Results
The Profile module helps users review saved recommendation records, reopen result details, and remove outdated entries. It is well suited to a pair of screenshots showing the list page and the detail page.
- Open the profile page to review saved history.
- Open a saved result for detailed inspection.
- Delete outdated records when needed.
Suggested Demo Sequence
This final block can remain text-only. It provides a concise order for platform demonstration or oral presentation.
Open Home
Introduce the platform and briefly explain the functional modules.
Run Recommend
Show patient-aware recommendation and explain the output fields.
Run Models
Demonstrate one or two prediction tasks and compare raw scores.
Show Explore + Data
End with structure exploration, complex rendering, and dataset browsing.